Setting up Field Testing
In this guide, we will show you how to set up Field Testing on your website by adding a piece of JavaScript code. We will cover how to implement the script in Google Tag Manager as well as the most popular Content Management Systems (CMS), such as WordPress, Joomla, Drupal, Wix, and Squarespace. Lastly, we will also provide a general approach that will work for any CMS.
How to set up Field Testing on your website
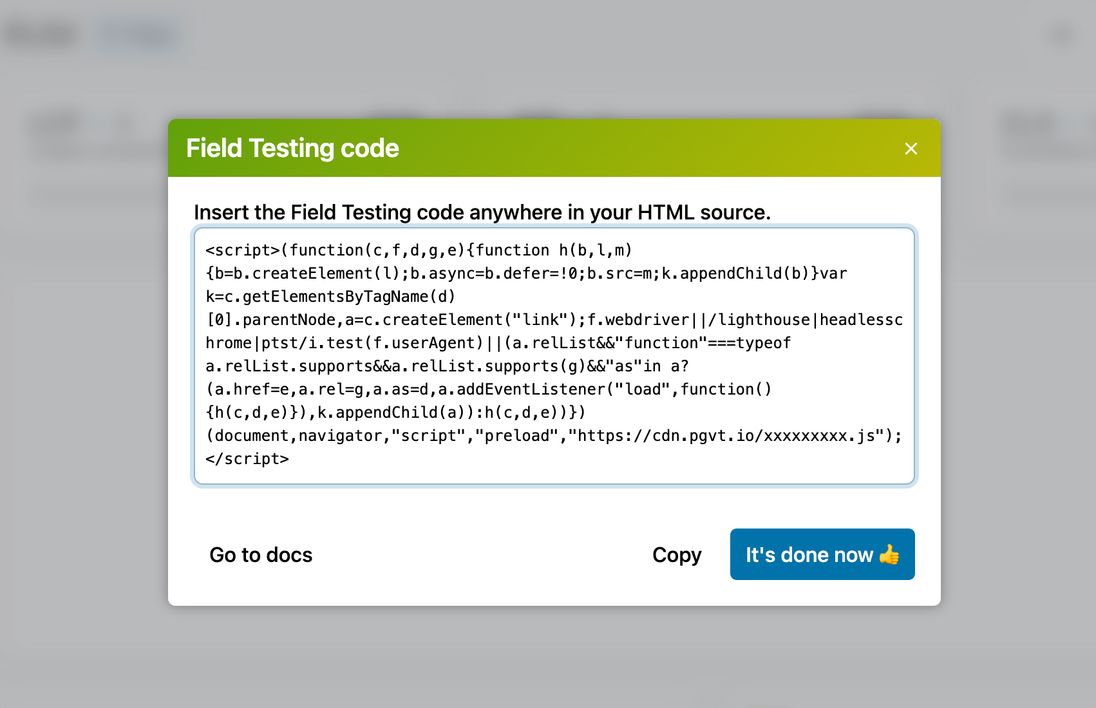
To set up Field Testing, first go to the menu item "Field Testing" in your PageVitals account. A modal will guide to to the script. Copy this script to the clipboard or save it elsewhere.
Google Tag Manager
Google Tag Manager is one of the most common ways to manage and add scripts (or tags) to your site. If you're already using GTM, it may be the easiest way to get started with Field Testing:
Sign in to your Google Tag Manager account: Navigate to Google Tag Manager and sign in to your account. If you haven't set up an account yet, create one and follow the steps to set up a new container for your website.
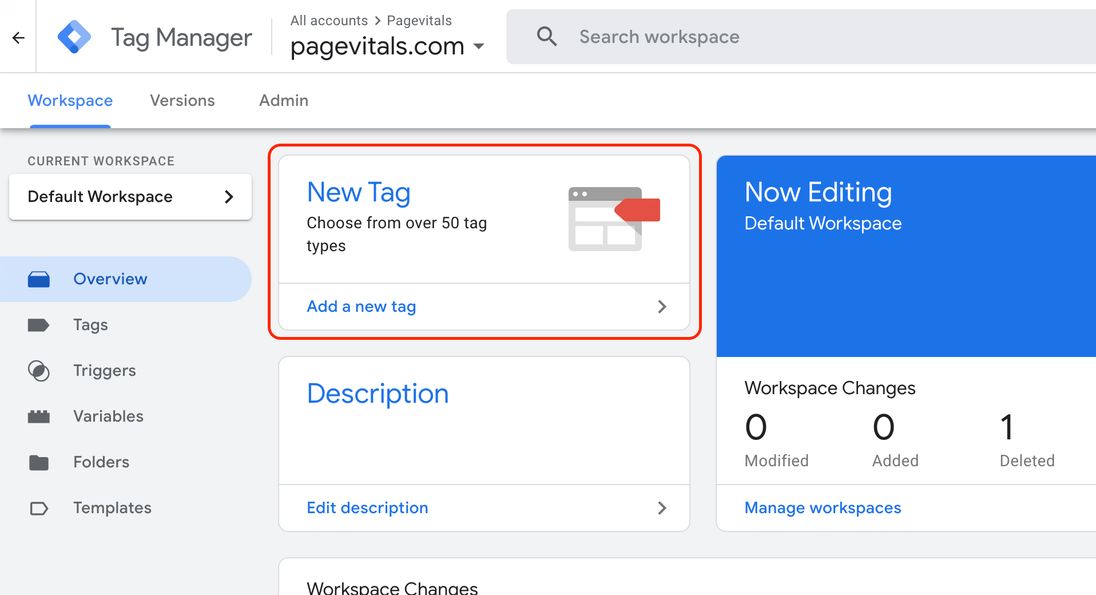
Create a new tag: In your GTM container dashboard, click on the "New tag" button.
- Name the tag: Write the name of the tag (like "PageVitals Field Testing") and click the "Tag Configuration section"

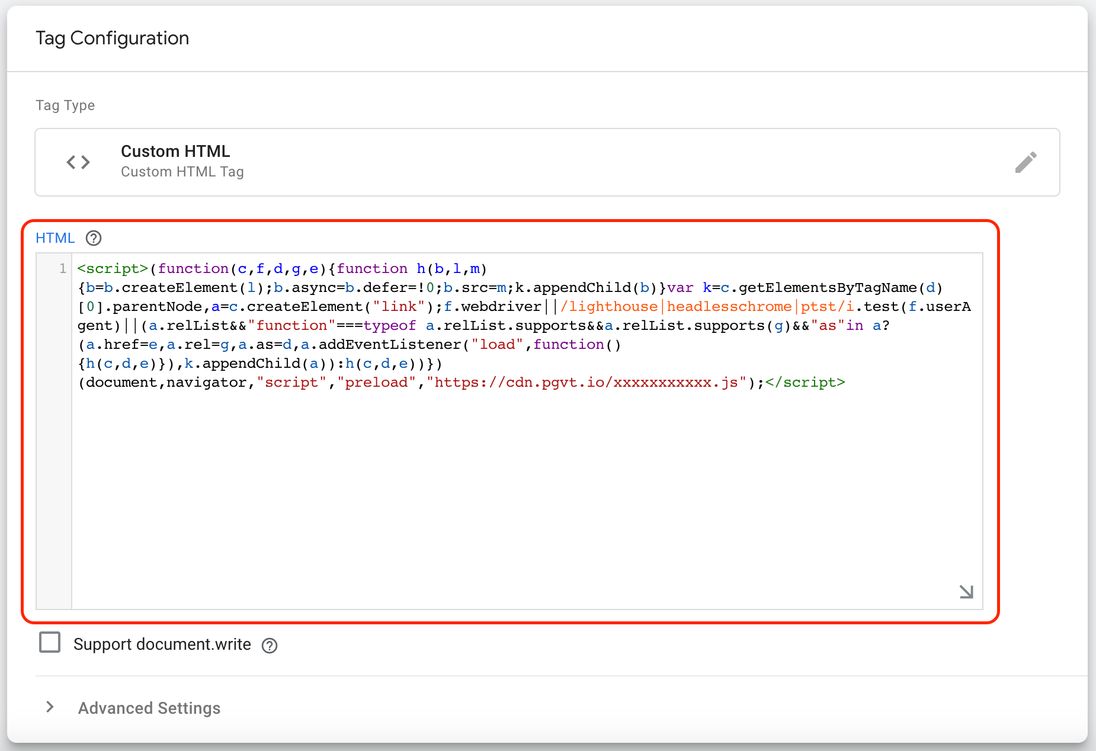
- Choose Custom HTML: From the list of tag types, select "Custom HTML."

- Add the PageVitals script: In the "HTML" input box, paste the script. You can include the
<script>tags or exclude them; GTM will handle it correctly either way.
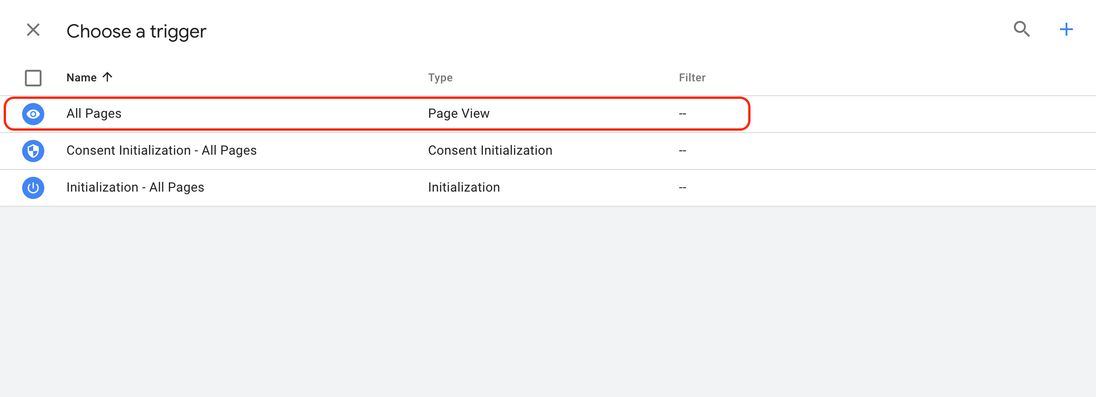
- Set up a trigger: Scroll down to the "Triggering" section and click on the "Choose a trigger to make this tag fire..." area. You can either select an existing trigger or create a new one. For example, you can choose the "All Pages" trigger if you want the custom script to load on every page of your website.
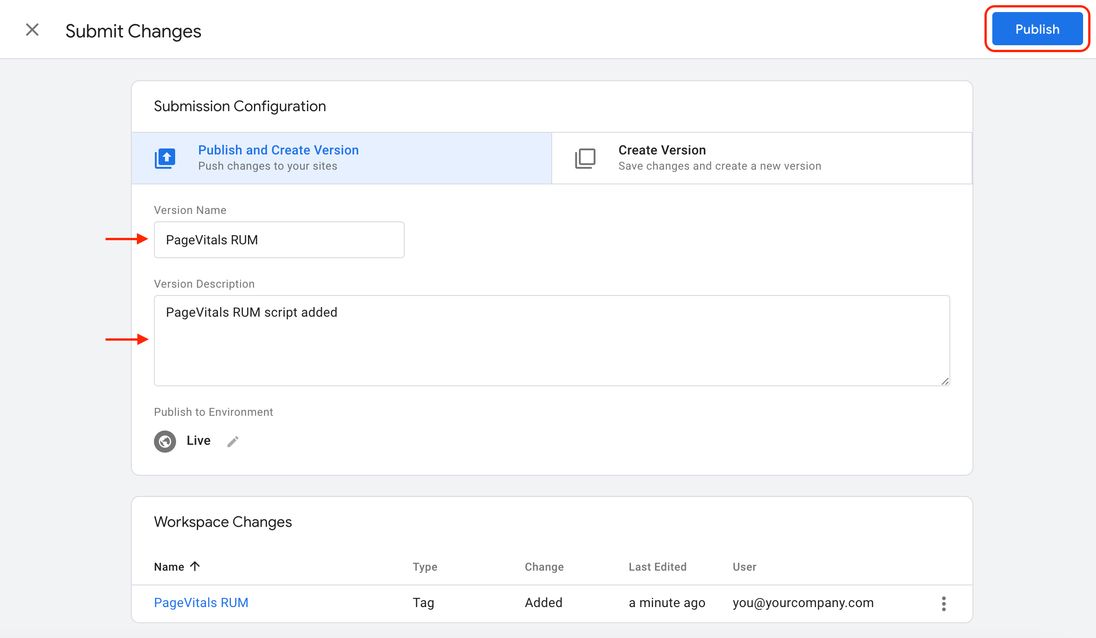
- Save and publish: After configuring the tag and its trigger, click "Save" on the top-right corner and return to your workspace. Click "Submit", write a version name and description, and then hit "Publish" to make the script live on your website.
WordPress
- In your WordPress dashboard, go to
Pluginsand clidkAdd New Plugin. - Under Search Plugins, write "pagevitals".
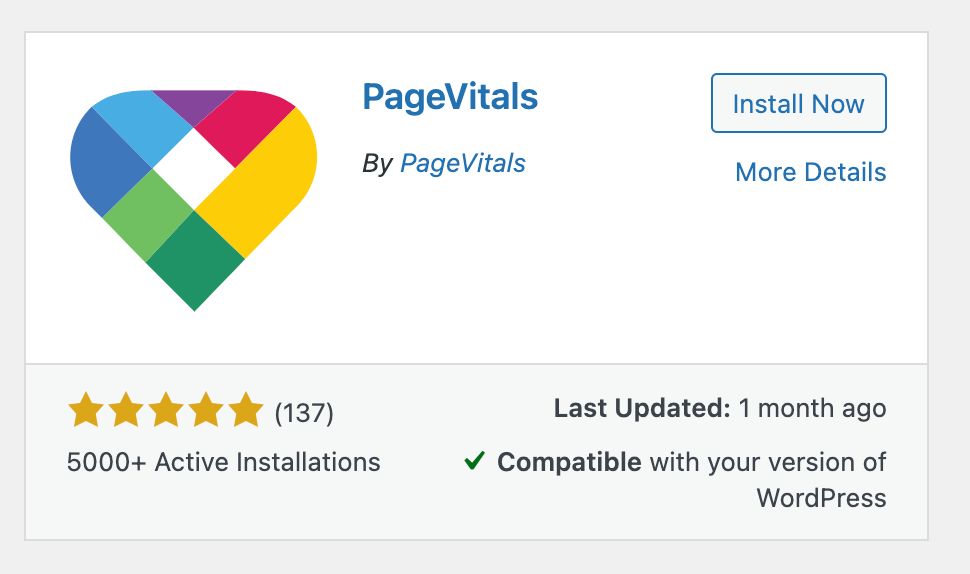
- When the plugin appears, click "Install Now".
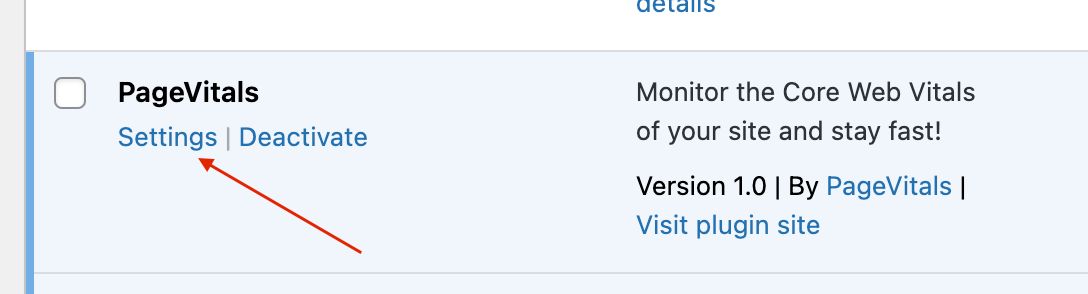
- Click "Activate" (it still won't be active on your site before you add the website ID)
- In the plugins list, click "Settings"
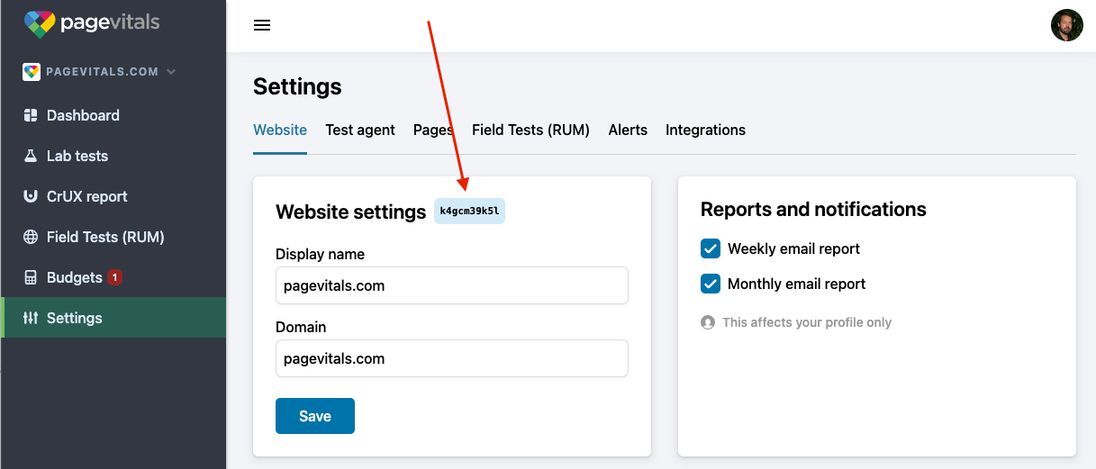
- Add your website ID to the field "Website ID". The ID can be found here:
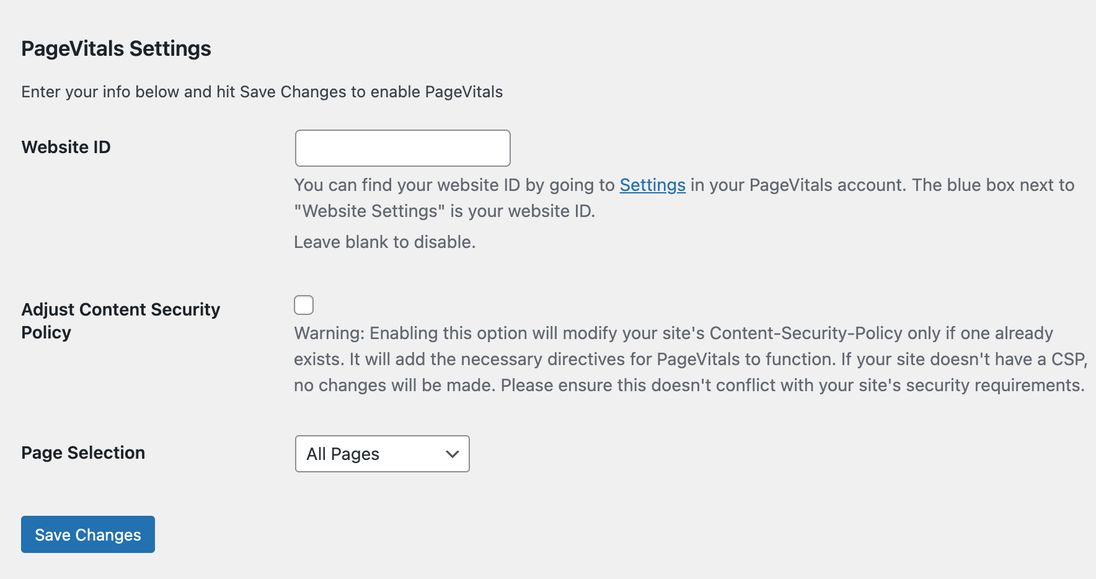
- If you want to only include the RUM script on specific pages, or add Content Security Policies, you can also do this, but it's not mandatory.
- Click "Save Changes" and you're done.
If the plugin doesn't appear in your search, you can download the PageVitals WordPress Plugin here.
Joomla
- In your Joomla admin panel, go to the
Extensions>Templatesmenu. - Click on your active template to open the template manager.
- On the
Editscreen, click theindex.phpfile to open the file editor. - Look for the opening
<head>tag or the closing</head>tag in theindex.phpfile. - Before the closing
</head>tag, paste your PageVitals script. - Click the
Savebutton to save your changes.
Drupal
- In your Drupal admin panel, go to the
Appearancemenu. - Locate your active theme and click on the
Settingsbutton for that theme. - In the settings page, scroll down to the 'Advanced' section and look for the 'Custom JavaScript' or 'Custom JS' option. If not available, you may need to edit your theme's template files directly.
- In the 'Custom JavaScript' or 'Custom JS' field, paste your PageVitals script.
- Click the 'Save configuration' button to save your changes.
If your theme does not have a 'Custom JavaScript' or 'Custom JS' option, you can manually edit the template files:
- Go to your Drupal installation's root directory and navigate to
themes/your_theme_name/templates. - Open the
html.html.twigfile or thepage.html.twigfile in a suitable text editor. - Look for the opening
<head>tag or the closing</head>tag. - Before the closing
</head>tag, paste your PageVitals script. - Save and upload the modified file back to the server.
Wix
- In the Wix Editor, click 'Site' in the top menu bar and choose 'Custom Code'.
- Click the '+ Add Custom Code' button that appears in the custom code manager.
- In the 'Add Custom Code' window, give your code a name (e.g., 'PageVitals Field Testing') and paste your PageVitals script in the 'Paste the code snippet here' field.
- Select 'Load code on each new page' in the 'Add Code to Pages' section.
- Set the 'Place Code in' option to 'Head'.
- Click the 'Apply' button to save your changes.
Squarespace
- In your Squarespace dashboard, go to the 'Settings' menu.
- Click on 'Advanced' in the left sidebar.
- Select the 'Code Injection' option.
- In the 'Header' field, paste your PageVitals script.
- Click 'Save' to save your changes.
General Approach
If you are using a different CMS or a custom-built website, follow these guidelines to add the PageVitals script to your site:
- Locate your website's files, either on your local machine or your web server.
- Identify the file responsible for the
<head>section of your site. It is usually namedheader.php,index.html,index.php, ordefault.html. - Open the identified file in a text editor.
- Look for the opening
<head>tag or the closing</head>tag. - Before the closing
</head>tag, paste your PageVitals script. - Save the modified file and upload it back to the server (if necessary).
After adding the script to your website, it is recommended to validate the implementation by checking for the presence of the script in the source code of your website.