Whitelisting PageVitals in Popular Web Application Firewalls (WAFs)
When static IP addresses are not feasible for whitelisting PageVitals, you can use alternative methods such as User-Agent strings or custom HTTP headers. This guide covers how to whitelist requests based on these identifiers in some of the most popular web application firewalls.
Popular web application firewalls
Whitelisting methods
User-Agent whitelisting
Most WAFs allow you to create rules based on the User-Agent string. For PageVitals, you can whitelist requests where the User-Agent ends with "PageVitals".
Custom HTTP header whitelisting
Alternatively, you can use a custom HTTP header like "X-Crawler: PageVitals" to identify your crawler. In this case you have to add the HTTP header to the PageVitals Test Agent first.
WAF-specific configuration
CloudFlare WAF
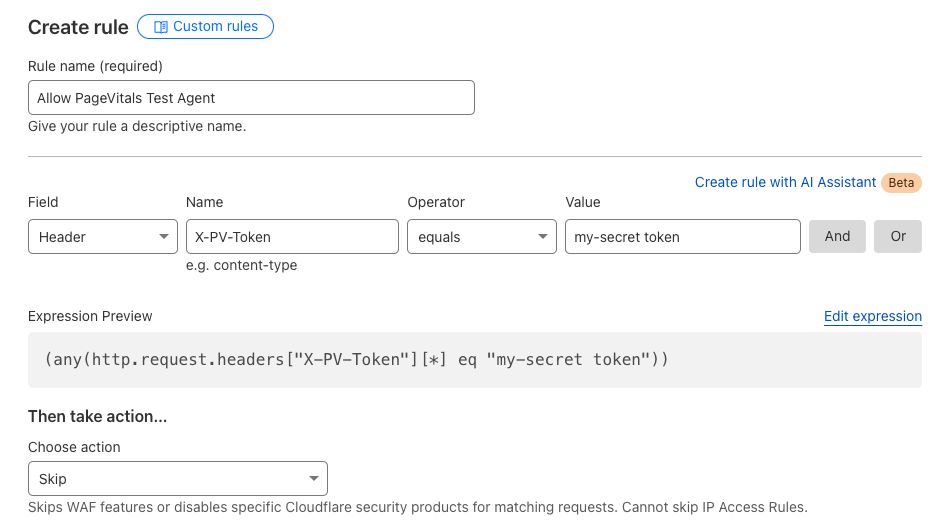
- Go to Websites in your CloudFlare dashboard and select your website.
- Go to the Security > WAF section, and click Custom Rules.
- UnCreate a new rule with the following conditions:
- For User-Agent: Select
User Agentin the field dropdown (you can scroll the list), thenends withas operator, andPageVitalsas value. Alternatively click "Edit expression" and add(ends_with(http.user_agent, "PageVitals")). - For custom header: Select
Headerin the field dropdown (scroll down in the list), thenequals, and then the value such asmy-secret-token. Alternatively click "Edit expression" and add(any(http.request.headers["X-PV-Token"][*] eq "my-secret-token")).
- For User-Agent: Select
- Set the action to "Skip", and skip the other blocking rules you have set up.

Read more on Cloudflare WAF docs
AWS WAF
Here's how you can create an AWS WAF rule to allow traffic either based on a User-Agent string or a custom HTTP header:
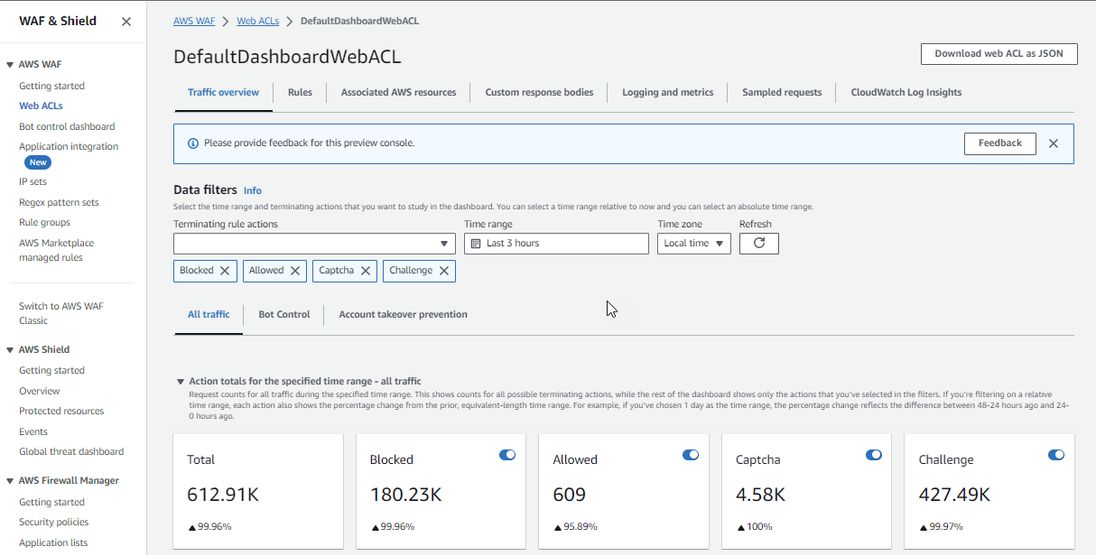
Navigate to AWS WAF in the AWS Management Console.
Create a Web ACL or select an existing one.
Add a new rule under the Web ACL.
Option 1 (User-Agent string)
- Add a
String Matchstatement. - Specify
User-Agentas the request component to inspect. - Use the
Ends Withoperator and set the value to"PageVitals".
- Add a
Option 2 (HTTP Header)
- Add a
String Matchstatement. - Specify
X-PV-Tokenas the HTTP header to inspect. - Set the match value to
"my-secret-token".
- Add a
Define rule action (allow or block) based on the match.
Save and deploy.

Read more on AWS WAF Documentation
ModSecurity
Add the following rules to your ModSecurity configuration:
# Whitelist based on User-Agent
SecRule REQUEST_HEADERS:User-Agent "@endsWith PageVitals" "id:1000,phase:1,allow,nolog"

# Whitelist based on custom header
SecRule REQUEST_HEADERS:X-PV-Token "@streq my-secret-token" "id:1001,phase:1,allow,nolog"
Imperva WAF
- In the Imperva WAF dashboard, go to the "Security Rules" section.
- Create a new custom rule with the following logic:
- For User-Agent:
${httpRequestHeaders.user-agent} ends-with "PageVitals" - For custom header:
${httpRequestHeaders.x-pv-token} equals "my-secret-token"
- For User-Agent:
- Set the action to "Accept Request".
Remember to test these configurations thoroughly in a staging environment before applying them to your production setup. Adjust the rules as necessary to fit your specific use case and security requirements.
If you can't make it work, try whitelisting our IP addresses instead.